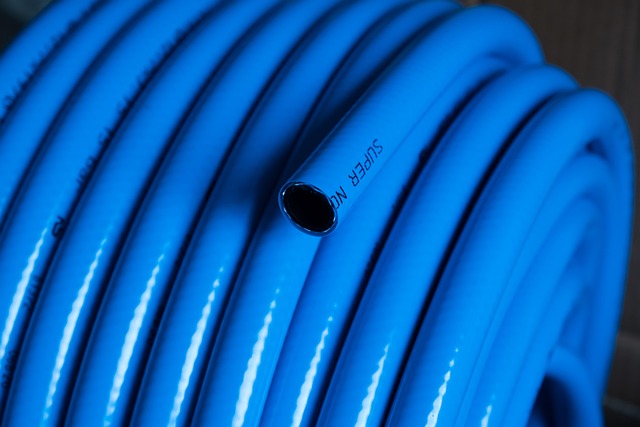
A leaky garden hose can quickly turn a pleasant gardening experience into a frustrating one, but fear not – with a little DIY know-how, you can easily repair your hose and get back to enjoying your time in the garden. In this article, we will guide you through the basics of garden hose repair, common issues you may encounter, the tools and materials you’ll need, and a step-by-step guide to fixing that pesky leak. We’ll also provide preventative maintenance tips to help you avoid future repairs, as well as creative upcycling ideas for repurposing old hoses in the garden. Keep reading to become a master at DIY garden hose repair!
– Understanding the Basics of Garden Hose Repair
Understanding the basics of garden hose repair is essential for any DIY enthusiast looking to save money and extend the life of their garden equipment. The first step is to inspect the hose for any leaks or damage, which can typically be spotted by looking for visible holes, cracks, or bulges. Once the issue has been identified, the next step is to assess the best method of repair based on the type and extent of damage. Common methods of garden hose repair include patching with a hose mender, using a hose clamp, or cutting out the damaged section and splicing the hose back together. By understanding these basic techniques, gardeners can easily and efficiently fix their own garden hoses and get back to enjoying their outdoor spaces.
– Common Issues with Garden Hoses and How to Fix Them
One common issue with garden hoses is leaks. Leaks can occur at the connections between the hose and faucet, or along the length of the hose itself. To fix leaks at the connections, simply tighten the hose to the faucet with a wrench. If the leak persists, you can try using a rubber washer to create a tighter seal.
For leaks along the length of the hose, you can use a hose repair kit, which typically includes a coupling and clamps. Cut out the damaged section of the hose, insert the coupling, and secure it with the clamps.
Another common issue is kinks in the hose, which can restrict water flow. To fix kinks, straighten out the hose and avoid bending it sharply. You can also try hanging the hose on a hose reel to keep it untangled and kink-free.
Cracks and holes in the hose can also be problematic. To fix these, you can use a hose mender. Cut out the damaged section of the hose, insert the mender, and secure it with clamps. Another option is to use duct tape as a temporary fix until you can replace the hose.
By addressing these common issues with garden hoses promptly, you can extend the life of your hose and ensure a smooth watering experience in your garden.
– Tools and Materials Needed for DIY Garden Hose Repair
To repair a garden hose yourself, you will need a few basic tools and materials. The most important tool you’ll need is a hose mender or repair kit, which typically includes two hose clamps and a hose mender. You’ll also need a sharp utility knife or scissors to cut the damaged section of the hose, a screwdriver to tighten the hose clamps, and a pair of pliers to help with any stubborn fittings.
In addition to the tools, you’ll also need some materials to complete the repair. This includes a hose mender or replacement hose fitting, depending on the severity of the damage. You may also need a small piece of garden hose to use as a replacement section if the damaged area is too large to repair with a hose mender.
It’s a good idea to have some water-resistant tape on hand as well, in case you need to temporarily patch a leak until you can properly repair it. Finally, having some lubricant such as dish soap or silicone spray can also be helpful when inserting fittings or connections.
By having these tools and materials ready, you’ll be prepared to tackle any garden hose repair that comes your way.
– Step-by-Step Guide to Repairing a Leaky Garden Hose
If you have a leaky garden hose, don’t worry – repairing it yourself can be a simple and cost-effective solution. Follow these step-by-step instructions to fix the leak and have your hose working like new:
1. Locate the leak: The first step in repairing a leaky garden hose is to determine where the leak is coming from. Run water through the hose and look for any areas where water is spraying or dripping out.
2. Cut out the damaged section: Once you have located the leak, use a pair of sharp scissors or a utility knife to cut out the damaged section of the hose. Make sure to cut a clean, straight line to ensure a proper seal.
3. Prepare the hose ends: After cutting out the damaged section, you will need to prepare the hose ends for repair. Use a hose mender or coupling to reattach the two cut ends of the hose. Make sure the ends are clean and dry before proceeding.
4. Attach the mender or coupling: Slide the mender or coupling onto one end of the hose, then slide the other end onto the other side. Secure the mender or coupling in place using hose clamps or screws, making sure to tighten them securely to prevent any future leaks.
5. Test the repair: Once you have attached the mender or coupling, turn on the water and check for any leaks. If the repair is successful, your garden hose should now be leak-free and ready for use.
By following these simple steps, you can easily repair a leaky garden hose and avoid the need for costly replacements. Keep in mind that regular maintenance and proper storage can help prevent leaks and extend the life of your garden hose.
– Preventative Maintenance Tips to Avoid Future Hose Repairs

To avoid future garden hose repairs, it’s important to practice preventative maintenance. One of the most crucial tips is to properly store your garden hose when not in use. This means draining all the water out of the hose before coiling it up and storing it in a cool, dry place. Leaving water in the hose can cause it to freeze and expand, leading to cracks and leaks.
Regularly inspecting your garden hose for any signs of wear and tear can also help prevent major repairs down the line. Look out for cracks, kinks, or bulges in the hose, as well as any leaks at the fittings. By catching these issues early on, you can address them before they worsen and require more extensive repairs.
Another important maintenance tip is to avoid dragging your garden hose over rough or abrasive surfaces, as this can cause abrasions and punctures. Instead, invest in a hose reel or guide to help protect the hose while moving it around your garden.
Lastly, be cautious when using your hose to water plants or clean surfaces. Avoid bending the hose at sharp angles or running over it with heavy equipment, as this can weaken the material and lead to potential leaks. By following these preventative maintenance tips, you can prolong the life of your garden hose and avoid frequent repairs in the future.
– Creative Upcycling Ideas for Repurposing Old Hoses in the Garden

When it comes to old garden hoses that are no longer usable for watering plants, there are plenty of creative ways to repurpose them in the garden. One idea is to cut the hose into smaller pieces and use them as protective covers for sharp garden tools. Simply slide a piece of hose over the blade of a pruning saw or the tines of a rake to prevent accidental cuts or injuries when reaching for tools in the garden shed.
Another fun upcycling idea is to use old hoses to create DIY garden art. Coil a long hose into a spiral and secure it with zip ties to create a unique garden sculpture or use shorter pieces to spell out words like “grow” or “bloom” in the flower bed. You can also use sections of hose to create custom trellises for climbing plants or as protective covers for exposed irrigation pipes.
For a more functional upcycling project, consider turning old hoses into soaker hoses for watering plants more efficiently. Simply poke holes along the length of the hose and connect it to a water source to create a custom drip irrigation system. This can be especially useful for watering rows of vegetables or flowers in a raised bed garden.
Overall, repurposing old garden hoses in creative ways not only reduces waste but also adds a touch of whimsy and personality to your garden space. So don’t throw away that old hose just yet – get creative and give it a new life in the garden!