Maintaining a healthy garden requires an efficient watering system, and your garden hose plays a crucial role in keeping your plants hydrated. However, leaks and other damages can put a damper on your gardening routine. In this article, we will delve into the world of DIY garden hose repairing, covering essential tools, common issues, step-by-step repair guides, prevention tips, and even creative upcycling projects for old hoses. Whether you’re a seasoned gardener or a newbie, mastering the art of hose repair can save you time and money. Plus, we’ll weigh the pros and cons of taking matters into your own hands versus hiring professional repair services. Let’s dive in and learn how to keep your garden hose in top shape!
1. Essential Tools for DIY Garden Hose Repair
When it comes to repairing a garden hose yourself, having the right tools on hand is essential. Here are some of the essential tools you’ll need for DIY garden hose repair:
1. Hose repair kit: A hose repair kit typically includes a hose mender, hose clamps, and a cutter. This kit will have everything you need to quickly and effectively repair a leak or hole in your garden hose.
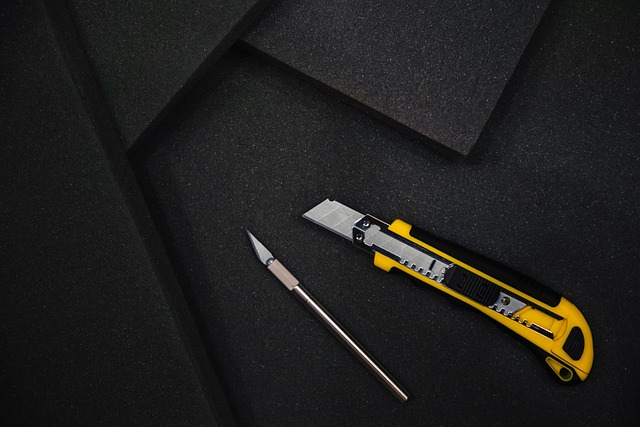
2. Utility knife or scissors: These tools will come in handy for cutting away damaged sections of the hose before making the repair.
3. Pliers: Pliers are useful for tightening hose clamps or removing and replacing fittings.
4. Heat gun or lighter: If you are dealing with a kinked or bent hose, a heat gun or lighter can help soften the hose material so it can be straightened out.
5. Duct tape: While not a permanent solution, duct tape can be a quick fix for small holes or leaks in a pinch.
Having these tools on hand will make it easy for you to quickly and effectively repair your garden hose whenever the need arises.
2. Common Hose Issues and How to Identify Them
One of the most common issues with garden hoses is leaks. Leaks can occur in various spots along the hose, including at the connection points, in the middle of the hose, or at the nozzle. Signs of a leaky hose include water spraying out from unexpected areas, the water pressure decreasing, or puddles forming around the hose.
Another common issue is cracks or splits in the hose material. These usually occur over time due to wear and tear, exposure to harsh weather conditions, or being run over by lawn equipment. You can identify cracks or splits by visually inspecting the hose for any visible damage, feeling for soft or weak spots along the hose, or noticing water leaking from the cracks when the hose is turned on.
Kinks in the hose can also be a common problem, especially if the hose has been improperly stored or rolled up. Kinks can restrict water flow and cause damage to the hose material over time. To identify kinks, run your hand along the length of the hose and feel for any sharp bends or twists in the hose.
By knowing how to identify these common hose issues, you can quickly address them and prevent further damage to your garden hose.
3. Step-by-Step Guide to Patching a Leaky Hose
Repairing a leaky hose is a simple DIY task that can save you money and prevent water waste. Here is a step-by-step guide to patching a leaky hose:
1. Locate the leak: Start by inspecting your hose to find the source of the leak. Look for any visible cracks, holes, or punctures in the hose.
2. Cut out the damaged section: Once you have identified the leak, use a utility knife or scissors to cut out the damaged section of the hose. Make sure to cut a clean, straight edge to ensure a proper seal.
3. Prepare the hose for patching: After cutting out the damaged section, clean the ends of the hose with rubbing alcohol or a mild detergent to remove any dirt or debris. This will help the patch adhere better to the hose.
4. Apply a hose repair patch: There are a variety of hose repair patches available, such as self-fusing silicone tape or rubber patches with adhesive backing. Follow the manufacturer’s instructions to apply the patch over the cut section of the hose, making sure to cover the entire area of the leak.
5. Secure the patch: Once the patch is in place, firmly press down on it to ensure a tight seal. Some patches may require a clamp or zip tie to hold them in place while they set.
6. Test the hose: Before using the hose again, turn on the water and check for any leaks. If the patch is successful, you should no longer see water dripping from the repaired section of the hose.
By following these simple steps, you can effectively patch a leaky hose and extend its lifespan, saving you the cost of having to replace it with a new one.
4. Tips for Preventing Future Hose Damage
To prevent future hose damage, there are a few tips and practices that can be followed. One of the most important tips is to properly store the hose when not in use. This means coiling it up neatly and storing it in a shaded area away from direct sunlight, extreme temperatures, and potential hazards like sharp objects or chemicals.
Another tip is to regularly inspect the hose for any signs of wear and tear, such as cracks, leaks, or kinks. By catching these issues early on, you can address them before they worsen and potentially cause a more serious problem.
It is also important to avoid dragging the hose across rough surfaces or sharp edges, as this can cause abrasions and punctures. Instead, try to carry or roll the hose to where it needs to be used.
Lastly, make sure to disconnect the hose from the water source and drain any remaining water before storing it during the colder months to prevent freezing and cracking. By following these tips, you can prolong the life of your garden hose and minimize the need for future repairs.
5. Upcycling Old Hoses: Creative Projects for Your Garden
When your garden hose has reached the end of its life and can no longer be repaired, don’t throw it away! Upcycling old hoses can be a fun and creative way to add some unique features to your garden. Here are a few ideas for creative projects using old garden hoses:
1. Garden Hose Mat: Cut your old hose into small pieces and then weave them together to create a colorful and durable mat for your garden. This can be a great way to add a pop of color to your outdoor space while also reusing materials that would otherwise end up in the trash.
2. Hose Basket: Coil your old hose into a circular shape and secure it with zip ties or wire to create a sturdy basket for holding garden tools, plants, or other items in your garden. You can even spray paint the hose before coiling it to add a unique design element.
3. Hose Planters: Cut your old hose into smaller sections and use them as planters for flowers or herbs. Simply fill the hose with soil and plant your seeds or seedlings directly into the hose. This can be a fun and creative way to display your plants while also reducing waste.
4. Hose Wreath: Coil your old hose into a circular shape and then attach it to a wire wreath frame using zip ties or wire. Add flowers, greenery, or other decorations to create a unique and colorful wreath for your garden gate or front door.
5. Hose Art: Cut your old hose into various lengths and arrange them in a pattern on a blank wall or fence in your garden. Secure the hose pieces with nails or staples to create a fun and eye-catching piece of garden art. You can even paint the hose pieces before hanging them to add even more color and visual interest.
Upcycling old garden hoses can be a great way to add some personality and creativity to your outdoor space while also reducing waste. Get creative with your old hoses and see what unique projects you can come up with!
6. Pros and Cons of DIY vs Professional Hose Repair Services
One of the main considerations when deciding whether to repair your garden hose on your own or hire a professional service is weighing the pros and cons of each option.
DIY repairs can be cost-effective, as you only need to purchase the necessary materials to fix the hose yourself. You also have the satisfaction of completing the repair on your own, which can be a rewarding experience. Additionally, DIY repairs allow for a quicker turnaround time, as you can address the issue immediately without having to wait for a professional to come and fix it.
On the other hand, professional hose repair services offer expertise and experience that DIY repairs may lack. A professional repair can ensure that the hose is fixed correctly and that the issue is addressed thoroughly. Additionally, professional services often provide guarantees or warranties on their work, giving you peace of mind that the repair will last.
However, professional repairs can be more expensive than DIY repairs, as you are paying for the expertise and labor of a trained technician. You may also have to wait for an appointment or schedule a time for the repair to be completed, which can be inconvenient if you need to use the hose right away.
Ultimately, the decision to choose DIY or professional hose repair services will depend on your budget, time constraints, and comfort level with completing the repair on your own. Both options have their advantages and drawbacks, so it’s important to weigh them carefully before making a decision.