Whether you’re an avid gardener or just like to keep your outdoor space looking tidy, a well-maintained garden hose is essential for maintaining a healthy landscape. However, over time, wear and tear can lead to leaks, holes, and other common issues that may hinder your watering efforts. Instead of rushing out to buy a new hose, why not try your hand at some DIY garden hose repairing? In this article, we will discuss essential tools for DIY garden hose repair, common hose repairs and solutions, a step-by-step guide to patching holes in your garden hose, tips for preventing leaks and extending the life of your hose, how to upcycle old hoses into useful gardening accessories, and troubleshooting tips for persistent hose issues. With a little know-how and some basic tools, you can save money and keep your garden in tip-top shape.
1. Essential Tools for DIY Garden Hose Repair
When it comes to repairing your garden hose on your own, having the right tools is crucial to ensure a successful fix. Here are some essential tools you will need for DIY garden hose repair:
1. Hose Repair Kit: This kit typically includes hose menders, clamps, and a hose cutter. The hose menders are used to splice the hose back together, while the clamps secure the mender in place. The hose cutter helps you cut out any damaged sections of the hose before applying the mender.
2. Screwdriver: A screwdriver may be needed to remove any screws or fasteners holding the hose fittings in place. It can also be useful for securing clamps or other components during the repair process.
3. Pliers: Pliers can be helpful for manipulating small hoses and clamps, as well as for tightening fittings or connections.
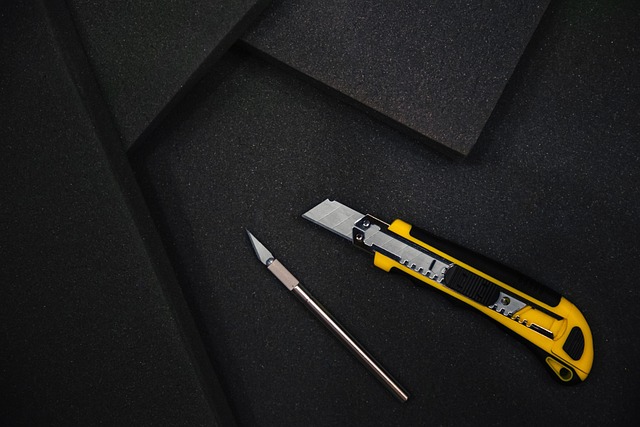
4. Knife or scissors: A sharp knife or pair of scissors is essential for cutting the hose cleanly and evenly. This will help ensure a proper seal when connecting the hose back together with a mender.
5. Gloves: While not a tool per se, a pair of gloves can protect your hands from sharp edges or hot surfaces during the repair process.
By having these essential tools on hand, you can easily tackle any garden hose repair job and keep your watering system functioning properly. Remember to always follow safety precautions and manufacturer guidelines when working on your garden hose.
2. Common Hose Repairs and Solutions

Common Hose Repairs and Solutions
One of the most common issues you may encounter with your garden hose is a leak. Leaks can occur for a variety of reasons, such as cracks in the hose, loose connections, or holes caused by sharp objects. To repair a leak in your garden hose, there are a few solutions you can try.
One simple and effective method is to use a hose repair kit, which typically includes a coupling and clamps to seal the leak. To fix a crack in the hose, you can also try using duct tape or electrical tape as a temporary solution. Another option is to cut out the damaged section of the hose and attach a new coupling to rejoin the two pieces.
In addition to leaks, another common problem with garden hoses is kinks. These can restrict the flow of water and potentially cause damage to the hose. To prevent kinks, always try to coil your hose properly when not in use and avoid dragging it across rough surfaces.
Lastly, if you notice your hose is spraying water unevenly or with reduced pressure, the issue may be a clog in the nozzle or a blockage in the hose itself. In this case, try removing the nozzle and cleaning out any debris, or use a wire hanger to clear any obstructions in the hose.
By being aware of these common hose repairs and solutions, you can easily troubleshoot and fix any issues that arise with your garden hose, allowing you to continue watering your plants with ease.
3. Step-by-Step Guide to Patching Holes in Your Garden Hose
If you have a garden hose with holes or leaks, there’s no need to go out and buy a new one. With a few simple tools and materials, you can easily patch up those holes and extend the life of your hose. Here’s a step-by-step guide to help you repair your garden hose:
1. Identify the location of the hole: Start by inspecting your hose and pinpointing the exact location of the hole or leak. This will help you determine the necessary tools and materials needed for the repair.
2. Clean and dry the area: Once you have identified the hole, make sure to clean the surrounding area with soap and water to remove any dirt or grime. Allow the area to dry completely before moving on to the next step.
3. Cut a piece of hose mender: Using a pair of scissors or a utility knife, cut a piece of hose mender that is slightly longer than the hole. Hose menders are typically made of metal or plastic and are designed to provide a watertight seal.
4. Insert the hose mender: Insert the hose mender into the hole, making sure it fits snugly. If the hole is larger than the mender, you may need to use a hose clamp to secure it in place.
5. Secure with hose clamps: Once the hose mender is in place, use hose clamps to secure it firmly onto the hose. Make sure to tighten the clamps until they are snug, but be careful not to over-tighten as this could damage the hose.
6. Test the repair: Before using your hose, turn on the water and check for any leaks. If the repair is successful, you should see no signs of water escaping from the patched hole.
By following these simple steps, you can easily patch up holes in your garden hose and keep it in working condition for years to come. Save money and reduce waste by repairing your hose instead of replacing it.
4. Preventing Leaks and Extending the Life of Your Hose
To prevent leaks and extend the life of your garden hose, there are a few key maintenance practices you should follow. First, make sure to store your hose properly by coiling it up neatly after each use and keeping it out of direct sunlight. This will help prevent kinks and cracks from forming in the hose over time.
Additionally, be sure to regularly inspect your hose for any signs of wear or damage, such as leaks, cracks, or bulges. If you notice any issues, address them immediately by repairing or replacing the affected sections. Regularly cleaning your hose, especially after each use, can also help prevent build-up and clogs that can lead to leaks.
Lastly, avoid dragging your hose over rough or sharp surfaces, as this can cause abrasions and weaken the material. Instead, gently guide the hose along its path to reduce strain and potential damage. Following these simple maintenance tips can help you prevent leaks and extend the life of your garden hose, saving you time and money in the long run.
5. Upcycling Old Hoses into Useful Gardening Accessories
One creative way to repurpose old garden hoses is to upcycle them into useful gardening accessories. Instead of throwing away damaged or worn-out hoses, consider giving them a second life by using them to make various tools and accessories for your garden.
One popular idea is to turn old hoses into soaker hoses. Simply puncture holes along the length of the hose and connect it to a water source. This DIY soaker hose can help deliver a steady stream of water to your plants, ensuring they receive the right amount of hydration without wasting water.
Another creative way to repurpose old hoses is to turn them into hose guides. By cutting the hose into smaller pieces and placing them around delicate plants or in high-traffic areas, you can protect your garden from accidental trampling. These hose guides can also add a whimsical touch to your garden design.
You can also use old hoses to create a DIY garden hose basket. By coiling the hose into a circular shape and securing it with zip ties, you can create a sturdy and flexible basket for storing gardening tools, pots, or even harvested fruits and vegetables.
Lastly, old hoses can be transformed into colorful and unique garden art. By cutting the hose into different lengths and shapes, you can create custom hose sculptures or decorations to add a touch of personality to your outdoor space.
Overall, upcycling old garden hoses can be a fun and eco-friendly way to breathe new life into your gardening routine. With a little creativity and some basic tools, you can turn your old hoses into useful accessories that will enhance the beauty and functionality of your garden.
6. Troubleshooting Tips for Persistent Hose Issues
If you are still experiencing issues with your garden hose even after attempting to repair it, there may be other underlying problems that need to be addressed. Here are some troubleshooting tips for persistent hose issues:
1. Check for kinks or twists in the hose: Sometimes, a kink or twist in the hose can cause water flow issues. Make sure the hose is straightened out and free of any obstructions.
2. Inspect the fittings: If the fittings are worn or damaged, they may not create a proper seal with the hose, causing leaks. Replace any damaged fittings to ensure a secure connection.
3. Look for cracks or holes: Even after repairing a hose, there may still be small cracks or holes that are causing leaks. Inspect the entire length of the hose for any additional damage and patch or replace as needed.
4. Examine the water pressure: Low water pressure can be a sign of a clog or blockage in the hose. Check for any debris or dirt that may be blocking the flow of water and clean out the hose if necessary.
5. Consider the temperature: Extreme temperatures can cause hoses to become brittle and more prone to damage. If you live in a region with extreme temperatures, consider storing your hose indoors during the winter months to prevent cracking.
6. Seek professional help: If you have tried everything and are still experiencing issues with your garden hose, it may be time to seek help from a professional. A gardening or hardware store can provide additional guidance and assistance in troubleshooting and repairing your hose.
